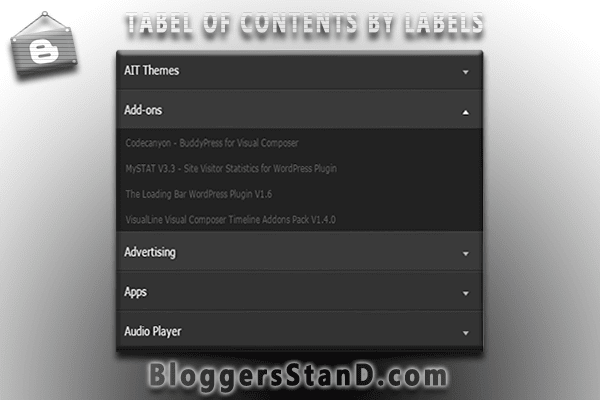
Hello Guys, Today in this article we are going to explain How to make beautiful table of contents with labels in blogger template.In previous post we have already talked about adding responsive Sitemap plugin in blogger static page.You must be using some kind of sitemap plugins in your blogspot website or blog.Sitemap is a very part of any website .whenever new visitor visit your blog s/he need to check the articles/contents of your website so all they visit sitemap of website or you can say table of contents.In this widget you can display your recent and updated articles/post by labels category.You don't need to make any category this widget have feature to call recent posts updates from the labels.When you publish new article in any category/label/tag in table of contents that post will appear with the New tag infront of the article so your readers can understand which one is new post or old.
We have created table of contents sitemap gadget with the help of java script , css and html.And the main important feature of table of contents tool is when you click on the categories/labels it will slide up and the content will display and when you click on another label first one will auto hide and second one will open so this make this widget beautiful and attractive from other sitemap widgets generators.And this design will definitely suits your website or blog niche.We have created the demo of the table of contents sitemap widget for blogger template and you can look below.In order to get beautiful sitemap widget follow the steps mentioned below.
We have created table of contents sitemap gadget with the help of java script , css and html.And the main important feature of table of contents tool is when you click on the categories/labels it will slide up and the content will display and when you click on another label first one will auto hide and second one will open so this make this widget beautiful and attractive from other sitemap widgets generators.And this design will definitely suits your website or blog niche.We have created the demo of the table of contents sitemap widget for blogger template and you can look below.In order to get beautiful sitemap widget follow the steps mentioned below.
DEMO
See the Pen Table of Contents Sitemap For Blogger Template by BloggersStand (@bloggersstand) on CodePen.
How to Create Table of Contents Sitemap Plugin For Blogger Static Page
Installation Steps:
Step 1. First Go to your blogger dashboard.
Step 2. Now Click on Add New Page
Step 3. Now Copy the below code and paste in your new static page,remember to change the compose button to HTML tab button.
<style scoped="" type="text/css">
.bsd-sitemap {
    background-color: #222;
    color: #ddd;
    font-family: Verdana,Geneva,Tahoma,Arial,Sans-serif;
    font-size: 14px;
    font-weight: 410;
    overflow: hidden;
    border-radius: 5px;
    box-shadow: 0 0 9px rgbaundefined0,0,0,.1);
}

.bsd-sitemap .toc-header {
    color: #fff;
    font-family: inherit;
    font-weight: 410;
    font-size: 14px;
    background-color: #333;
    margin: 0;
    padding: 13px;
    overflow: hidden;
    cursor: pointer;
    border-top: 1px solid #444;
    border-bottom: 1px solid #222;
    transition: initial;
}

.bsd-sitemap .toc-header:hover {
    background-color: #3a3a3a;
}

.bsd-sitemap .toc-header:before {
    content: '';
    width: 0;
    height: 0;
    position: relative;
    float:right;
    top: 10px;
    right: 10px;
    border: 5px solid transparent;
    border-color: #aaa transparent transparent;
    transition: all .3s ease;
}

.bsd-sitemap .toc-header.active {
    background: #3a3a3a;
    color: #fff;
}

.bsd-sitemap .toc-header.active:before {
    border-color: #fff transparent transparent;
    top: 5px;
    -webkit-transform: rotateundefined-180deg);
    -moz-transform: rotateundefined-180deg);
    -ms-transform: rotateundefined-180deg);
    -o-transform: rotateundefined-180deg);
    transform: rotateundefined-180deg);
}

.bsd-sitemap .loading {
    display: block;
    padding: 14px;
    text-decoration: blink;
}

.bsd-sitemap ol {
    margin: 0;
    padding: 0;
    list-style: none;
    transition: initial;
}

.bsd-sitemap li {
    line-height: normal!important;
    margin: 0!important;
    padding: 7px 7px 7px 16px!important;
    white-space: nowrap;
    text-align: left;
    overflow: hidden;
    background: #222!important;
    transition: initial;
}

.bsd-sitemap a {
    color: #aaa;
    text-decoration: none;
    font-size: 87%;
    transition: initial;
}

.bsd-sitemap a:visited {
    color: #666;
    transition: initial;
}

.bsd-sitemap a:hover,.bsd-sitemap a:visited:hover {
    color: #fff;
    text-decoration: none;
    transition: initial;
}

.post ol li:before {
    display: none;
}
</style>
<div class="bsd-sitemap" id="bsd-sitemap">
<span class="loading">Sitemap Loading..</span></div>
<script>
var toc_config = {
    url: 'http://bloggersstand.com/',
    containerId: 'bsd-sitemap',
    showNew: 15,
    newText: ' <strong style="font-weight:normal;font-style:normal;color:#fff;font-size:11px;background:#FF0000;padding:1px 6px 3px 6px;line-height:normal;float:right;border-radius:2px;">New!</strong>',
    sortAlphabetically: {
        thePanel: true,
        theList: true
    },
    maxResults: 9999,
    activePanel: 1,
    slideSpeed: {
        down: 400,
        up: 400
    },
    slideEasing: {
        down: null,
        up: null
    },
    slideCallback: {
        down: functionundefined) {},
        up: functionundefined) {}
    },
    clickCallback: functionundefined) {},
    jsonCallback: '_toc',
    delayLoading: 0
};
</script>
<script src="https://cdn.rawgit.com/ishekharsingh/bloggersstand/master/accordion.js"></script>
</div>
- Replace bloggersstand.com with your URL.